


Project URL:particles.js Online creation and demo link:particles.js demo
Specific method:
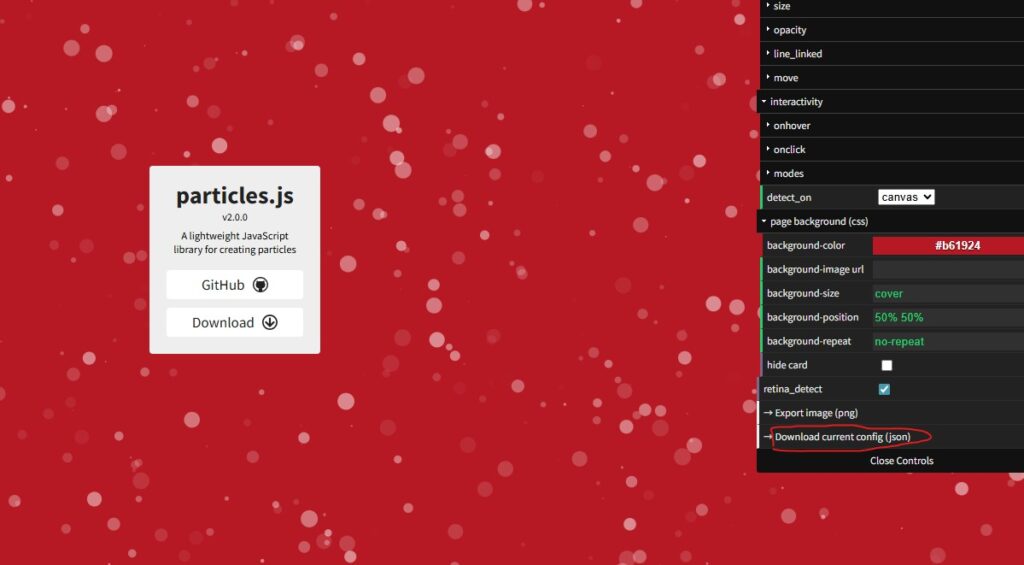
If you don't want to handle the deployment yourself, you can simply...particles.js demo...on your site, you can customize a dynamic background—almost everything, including particle parameters, is adjustable. Spend some time exploring the settings, then click "Download JSON" at the bottom to save the configuration file.
Taking the Zibi theme for WordPress as an example, here is how to achieve this effect:
To integrate the "snowfall" effect from particles.js into the Zibi theme, you can use the custom code sections provided by the theme. Here are the detailed steps:
1.Custom Header HTML:
You need to include the particles.js library in your HTML. Add the following code to the "Custom Header HTML" section of the Zibi theme:
<script src="https://cdn.jsdelivr.net/particles.js/2.0.0/particles.min.js"></script>https://cdn.jsdelivr.net/particles.js/2.0.0/particles.min.jsThis originates from...particles.js ...the official project. You can also host it on your own server, or just use it directly if you prefer not to go through the setup process.
2.Custom JavaScript:
Here, you need to initialize particles.js. Depending on your theme's documentation, this step might not be necessary... <script> ...within the tags, just enter the following JavaScript code:
window.onload = function() {
  particlesJS('particles-js', {
    "particles": {
      "number": {
        "value": 120,
        "density": {
          "enable": true,
          "value_area": 1443.0708547789707
        }
      },
      "color": {
        "value": "#fafafa"
      },
      "shape": {
        "type": "circle",
        "stroke": {
          "width": 0,
          "color": "#000000"
        },
        "polygon": {
          "nb_sides": 8
        },
        "image": {
          "src": "img/github.svg",
          "width": 100,
          "height": 100
        }
      },
      "opacity": {
        "value": 0.5,
        "random": true,
        "anim": {
          "enable": false,
          "speed": 1,
          "opacity_min": 0.1,
          "sync": false
        }
      },
      "size": {
        "value": 10,
        "random": true,
        "anim": {
          "enable": false,
          "speed": 40,
          "size_min": 0.1,
          "sync": false
        }
      },
      "line_linked": {
        "enable": false,
        "distance": 112.2388442605866,
        "color": "#ffffff",
        "opacity": 0.4,
        "width": 2
      },
      "move": {
        "enable": true,
        "speed": 1.603412060865523,
        "direction": "none",
        "random": true,
        "straight": false,
        "out_mode": "bounce",
        "bounce": false,
        "attract": {
          "enable": false,
          "rotateX": 400.8530152163807,
          "rotateY": 881.8766334760375
        }
      }
    },
    "interactivity": {
      "detect_on": "canvas",
      "events": {
        "onhover": {
          "enable": true,
          "mode": "bubble"
        },
        "onclick": {
          "enable": true,
          "mode": "repulse"
        },
        "resize": true
      },
      "modes": {
        "grab": {
          "distance": 400,
          "line_linked": {
            "opacity": 0.5
          }
        },
        "bubble": {
          "distance": 400,
          "size": 4,
          "duration": 0.3,
          "opacity": 1,
          "speed": 3
        },
        "repulse": {
          "distance": 200,
          "duration": 0.4
        },
        "push": {
          "particles_nb": 4
        },
        "remove": {
          "particles_nb": 2
        }
      }
    },
    "retina_detect": true
  });
};
Essentially, this step involves...Initialize particles.js using the JSON configuration you downloaded after customization.Since the WordPress environment does not allow for direct server-side reading of local files, you need to copy the contents of the JSON file into your JavaScript code for configuration. Essentially, the core of this JavaScript consists of the code from the JSON file you downloaded earlier. If you're unsure how to initialize the JS, you can ask an AI for help.
3.Custom CSS:
Ensure the container for particles.js displays correctly on the page and is set to full-screen. Add the following to "Custom CSS":
#particles-js {
  position: fixed;
  top: 0;
  left: 0;
  width: 100%;
  height: 100%;
  z-index: -1; /* 确保在背景显示 */
}4.Add a particle container:
You will need a... <div> Use an element as a container for the particles. Add the following code either in the "Custom Footer HTML" section or directly into your theme template:
<div id="particles-js"></div>Once these steps are complete, save your changes. When you visit your website, you should see the configured particle effect.
Example URL:"ninept" piano sheet music If you want the exact same background effect as shown in this example, simply copy the code above—no need to create a custom JSON file. That said, I recommend customizing your own particle background to your preference. In this example, the entire page has been made transparent, which is why the particle background is visible throughout. I have covered the method and code for achieving a full-page background effect in other articles; feel free to search for them.




No Comment! Be the first one.